When you're installing a new water meter, take particular care to ensure the job is done correctly from the start. Careless mistakes made during the installation can damage the new water meter and supply line connections, as well as potentially cause significant property damage if leaking and left unattended. How do you get through the process properly without having to worry about potential issues that may arise? Here are some general guidelines to follow with most water meter installations.
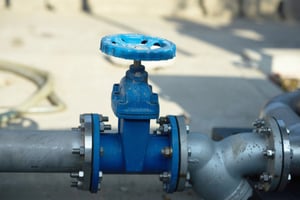
A properly working service line valve is essential in completing this process. Generally, there are two options; a service line valve located outside (typically at or near property line or a meter pit) or a line valve located within the dwelling, in a cellar or mechanical closet. Here are some of the most important things you need to know about installing meters
Regardless of whether the installation is to replace an existing meter or to install a new meter, take note of the following;
- It is good practice before cutting any pipe or removing
 anything that you perform the service line shut down to make sure that the line valve you are relying on is working properly.
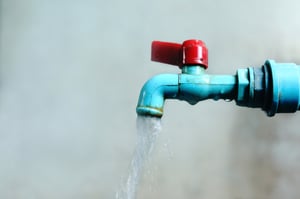
 - This is done by removing the screen in a cold water supply faucet in the dwelling and flowing that faucet at a slow or medium pace.
- Turn off the supply line valve and check the faucet to make sure that the water supply has been turned off.
- The cold water faucet can be left partially open, because you will reverse the process after the installation has been completed.
When replacing an existing meter;
- Turn water supply line off as noted above.
- Does the new water meter have the same lay length? If it does, then the procedure is quite simple.
- Generally, all that is required are the new rubber meter gaskets of the appropriate size and a
 crescent or pipe wrench.
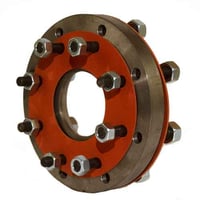
 - If the replacement meter is not the same lay length, there are a number of adapters available to retro-fit the space to accommodate the new meter, including Space-Saver Flanges(Red Hedtrademarked) for larger meters that will help that process go much more easily.
- Before installing the new meter always run the water to flush the service line at a slow rate to ensure the line is free of any rust or sediment.
- Check the water meter for the proper direction of flow. The meter will have some kind of flow direction indicator located on the top or sides of the meter. Then install the new meter and rubber gaskets.
- For proper installation, never use a wrench to start the thread connections. Always start the meter connections by hand to make sure that the connections are not cross-threaded.
- In most cases, connection seals with rubber gaskets are made by hand tightening the meter adapters and then completing the leak tight seal using a wrench. Typically, all that is needed after hand tightening is an additional quarter turn to seal the gaskets.
- To reactivate the service line after the meter installation, it is good practice to have a cold water faucet partially open.
- Open the service line valve slightly to allow for any air in the system to be purged through the open cold water faucet. Once all air is purged from the system, turn off the faucet and check the water meter and appurtenances for any leaks. Clean all connections with a dry cloth and re-check for any visible moisture.
- Be sure to turn the supply line valve completely on.
- Take a few moments to run some water in the dwelling to verify that the meter is registering and flowing in the proper direction.
In a new meter installation;
- Turn water supply line off as noted above.
- A new water meter installation will require additional meter adapters that are available in various types and
 sizes depending on service pipe material and meter sizes. Examples of various meter accessories are meter setters, meter couplings and meter flanges. NOTE: Check on local codes, check valves are often required as part of the meter installation.
 - Before installing the new meter, always run the water to flush the service line at a slow rate to ensure the line is free of any rust or sediment.
- Check the water meter for proper direction of flow. The meter will have some kind of flow direction indicator located on the top or sides of the meter. Then install the new meter and rubber gaskets.
- For proper installation, never use a wrench to start the thread connections. Always start the meter connections by hand to make sure that the connections are not cross threaded.
- In most cases, connection seals with rubber gaskets are made by hand tightening the meter adapters and then completing the leak tight seal using a wrench, typically all that is needed after hand tightening is an additional quarter turn to seal the gaskets.
- To reactivate the service line after the meter installation, it is good practice to have a cold water faucet partially open.
- Open the service line valve slightly to allow for any air in the system to be purged through the open cold water faucet. Once all air is purged from the system, turn off the faucet and check the water meter and appurtenances for any leaks. Clean all connections with a dry cloth and re-check for any visible moisture.
- Turn the supply line valve completely on.
- Take a few moments to run some water in the dwelling to verify that the meter is registering and flowing in the proper direction.
We can assist with making the right choices that work best for your metering decisions. By knowing what you need to do to install a new water meter, you can ensure that the job is done properly the first time with no damage to the system or meter. So which meter is the best one for your situation? Should you stick with a manual read meter or one that is AMR/AMI compatible? What if you're replacing an older meter and the new one doesn't fit correctly? No matter what your question is, Team EJP is here to help. Please feel free to contact us today for more information or with any questions.