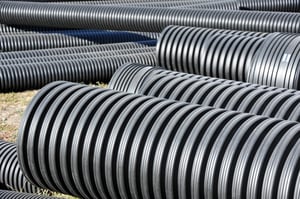
When it's time to upgrade your culverts, have you considered polyethylene? With a strong, corrugated exterior that provides superior strength and a smooth interior that improves hydraulic flow, polyethylene culverts and drain pipes provide you with a good option to improve stormwater management in your water utility. But what do you need to do to properly install this type of material? Here's a quick glance at the overall process.
 Trench preparation for laying HDPE culvert and drain pipe is similar to that of other pipe materials. Your trench should be wide enough for placement and compaction of the backfill materials on either side of the pipe, with the space for the backfill materials on either side increasing with the size of the pipe. You can refer to the pocket installation guide to get a more specific trench width.
The bottom of the trench must be capable of providing long-term support to the culvert or pipe and the backfill material, providing a uniform surface. One option to consider if the bottom of the trench is irregular is adding a trench box. You'll need to create a sub-trench for the box to rest on, allowing the compacted backfill to remain undisturbed while the trench box is moved.
You'll also want to ensure that groundwater and stormwater don't enter the trench, which can cause issues with the integrity of the installation. Any rock outcroppings or loose rock and debris that could damage the culverts and drain pipe should be removed. With four to six inches of bedding material in place, the outer two-thirds of the bedding can then be compacted.
Next, you'll need to assemble the pipe. To maintain proper performance, you'll need to take care in assembling the bell and spigot. Lay your pipe in place and position it carefully, then clean out the bell and spigot ends. Remove the protective plastic from the gasket, then apply an appropriate gasket lubricant to the bell and spigot ends of the pipes using a clean rag or brush, taking care that the lubricated sections do not touch the ground or become dirty.
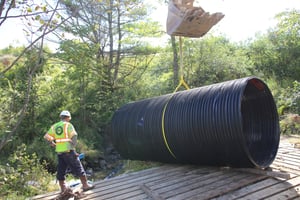
Using a nylon sling and a backhoe, line up the two ends and pull the spigot squarely into the bell, maintaining a low insertion angle of 1.5 degrees or less. If you must push on the bell to assemble the pipes, it's vital that you use an assembly installation stub to protect the bell's integrity. You may need to adjust the length of some pipes to meet your project's needs, which should be completed according to your material's pocket installation guide.
Once everything is in place, it's time to backfill. Though there are many materials available, refer to the pocket installation guide to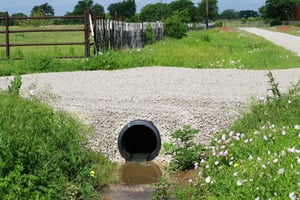 ensure you're using an appropriate backfill material for your needs. Other materials, including native soils, which are not listed as a class 1, 2 or 3 material generally should not be used. Knife the backfill material underneath the pipe to prevent voids and help ensure even backfill placement. This also helps prevent the pipe from shifting during backfilling. Initial backfill should cover the pipe crown by at least six inches, with a final backfill of native soil or other material on top of that.
By taking the time to properly install your polyethylene culverts and drain pipes, you'll get years of reliable service out of them. If you're trying to decide whether PE culvert and drains are right for your water utility's needs, Team EJP can help. Please feel free to reach out today with any questions, to get more details or to get a quote for your next project.